Showing posts with label dolls house. Show all posts

Dolls house miniature toy box

Hello everyone!

It's been quite a while since my last post. I hope life is treating you kind and that you are all well. The last few years have been a bit tough on a personal level, but I'm feeling positive and motivated at the moment and praying for a good year. I'm also hoping to start posting regularly again, so fingers crossed, we'll have plenty of mini conversations here at Little Canvas this year!

I'll kick off by sharing a miniature treasure chest I decorated for a club challenge at the end of last year. I turned it into a toy box, painted with images inspired by Riley Blake's Little Red Riding Hood fabric. The plan is to use this fabric in the children's room in one of my dolls houses, so I thought that would be perfect for the toy box. I really enjoyed painting this, so might try my hand at doing more painted furniture in future.

The toy box, in a temporary playroom setting.


The Riley Blake fabric I'll be using. Isn't it gorgeous?


~~~~~~~~~~~~

Thank you for stopping by Little Canvas! If you are a first time visitor, welcome! I would be honoured if you would take a moment to leave a comment; subscribe to my blog or like my Facebook page, Little Canvas. Do keep in touch, I love to hear from new (and old) friends! Until next time, keep well!

How to remove wall paper from a dolls house

Now I cannot claim this brilliant tip as my own, but I can tell you I have used it many times and it works a treat!

When I first started renovating dolls houses about a year or so ago, I was struggling to get rid of old wall and floor paper in one of my houses. The lovely Marilyn, a fellow miniaturist and dolls house enthusiast (her work is amazing!! Find her latest blog at http://daltonhouse.blogspot.co.uk/ ) then gave my the tip of using warm water and fabric softener to remove the wall paper. And it worked brilliantly!

Since then I have parted with this little nugget of information many times, but I always get asked the same questions.... "how much water, how much fabric softener?" Truth be told, I didn't really know! hahah I just eye ball it. Sooooo.... as I'm renovating another house at the moment, I thought I'd write a post about the process. This might not be the way others do it, but it's the way that works best for me. I hope this tip helps you as much as it helped me!

The equipment.
I keep a bucket close by for all the scraps of paper
Plastic pallet knife, not required, but works for me.
Sponge for water
Dry cloth or dry sponge for rubbing paper off
Patience (where can one buy this??)
Oh and I wear gloves, but that's simply because my fingers hurt easily 
and I like to protect my nails. Not a requirement. 


I use an empty ice cream container for the mixture.
Fill about a quarter (maybe little less) with warm water (not hot)
Add a cap full (medium size) of fabric softener (I use a cheap brand)


First remove all the dry paper that comes off easily


Wet the sponge with your fabric softener mixture, squeeze to let most water out.
You DO NOT want to soak your wood or MDF.
Dampen the area (work in smaller areas at a time as it tends to dry)
Wait 30-60 seconds
Rub the paper off with a cloth, a sponge or a plastic artist pallet knife. Whatever works for you.
Please be careful when using the pallet knife. don't hurt yourself or the wood, and whatever you do, don't use a metal one! It will scratch the wood.
It can take a few repeats of the process before the paper and glue starts lifting, so be patient. 


And then..... after a while ... magic happens
And voilĂ ! It's done! 
This door took me about 15 minutes.


Now, I know there is still slight evidence of glue left here. But I've scrubbed it down with a sponge to a smooth finish and I am happy with it. I'm going to wall paper over it, so it won't be visible. I'm happy, and that's all that matters. You can stop or continue to scrub until you're happy with the result.


Disclaimer: This is a tutorial written from my own experience. While it works for me, you use this     information at your own risk. I am not responsible for any damage or injury resulting in the use of this article. 

~~~~~~~~~~~
Thank you for stopping by Little Canvas! If you are a first time visitor, welcome! I would be honoured if you would take a moment to leave a comment; subscribe to my blog or like my Facebook page, Little Canvas. Do keep in touch, I love to hear from new (and old) friends! Until next time, keep well!

Tudor style dollhouse: From house to pub

At last I feel great excitement about my Tudor style dollhouse! I've been playing yo-yo with this house for months now. As it is not a proper Tudor, but a replica of the Tudor revival houses (called Mock Tudors in the UK) that were build in the 20th century, I never planned on decorating it in the Tudor style. However, the more I researched the decor of the time these houses were build, the less I liked it. I just couldn't figure out where I was going with this house. Keeping with a period when decorating is one thing. Being happy with it is quite another! And as I'm the one putting all the time, effort (fun) and money into it, I feel it's important that I actually like the house when I'm done with it!


By last week I decided to decorate it in American 1950's style, because that is a style I like and can live with. And then a few days ago it hit me.... why not turn it into a pub or shop or something? It's a small house and I have no intention of knocking out walls, but surely it was do-able? And now, finally - after two days of research (should've gone pub crawling! haha) - I can tell you that this house will be turned into a small, but exclusive coffee lounge/pub/function room. A re-purposed building!

I'm so excited about this! It will give me something completely different to work on. I will be decorating with 1/16 scale furniture, as was the intention all along. Will be a long while before I have enough furniture and accessories, but as I do have a few pieces, I thought I'd try them out and see what it looks like. This room will be the coffee shop/lounge area. I like where this is going...!


I played around with some paper I have too. The front walls of the house have been removed by a friend of mine who helped me fix a few things I needed tools for, which I don't have. We will put them back once I've done all the renovation work on the house. 


I do love these papers. I quite like using bold patterns and colours in my dollhouses. Wait till you see the size of the patterns and colour of the paper I've chosen for my other houses! They're huge! hahah 


So what do you think? Will you be popping over for a drink or coffee in a few months time when the pub is opened for business? Hope so! 

~~~~~~~~~

Thank you for stopping by Little Canvas! If you are a first time visitor, welcome! I would be honoured if you would take a moment to leave a comment; subscribe to my blog or like my Facebook page, Little Canvas. Do keep in touch, I love to hear from new (and old) friends! Until next time, keep well!

Miniatures on Pinterest

I don't know about you, but I can certainly get lost on Pinterest. I just love it! So for today, I thought I'd share my miniatures Pinterest boards with you.

I used to have one board for Little Canvas, but have now split it in two. I found it became a bit of a mess, what with my artwork and all the doll house renovations and everything in one place. So now I have one for the artwork, and one that focus mainly on the doll houses and miniatures.

African sunset with people silhouette - Little Canvas


Little Canvas: My first ever dolls house!

I also have a number of boards that are doll house and miniature related. I'm sure this is only the beginning and I'll have many more boards on this topic in future! 

Georgian Mansion by Anthony Wright.
Photo source: Pinterest 

Pinner said: Make your own.  Use condiment containers, and cut it down.  Add your own paper.  I added push pins (without the pin part) on the bottom as legs to make it a bed tray
Photo Source: Pinterest

Wow!
Photo Source: Pinterest

Free Printable dollhouse wallpaper
Photo Source: Pinterest

I hope you have fun visiting all my Pinterest boards. There are so many wonderful artisans out there who do amazing work in miniature! 

~~~~~~~~~~~~

Thank you for stopping by Little Canvas! If you are a first time visitor, welcome! I would be honoured if you would take a moment to leave a comment; subscribe to my blog or like my Facebook page, Little Canvas. Do keep in touch, I love to hear from new (and old) friends! Until next time, keep well!

Let the renovation begin!

I'm finally starting with my dollhouse's renovation! The first house I'll be taking on is the "big house" with the base. I don't have names for the houses yet, except for the Mock Tudor, which is obvious.  I'll probably end up working on them all at the same time in the long run, but for now, I'm starting with this one:


This house has the least amount of work out of my three houses. It only has paper on the walls and floor of one room, and some glue left on the floor of a room in the roof. The base is in a good condition. I will just paint it in the same colour as the rest of the house, whatever that may be. I haven't decided on a colour yet. That being said.... the wallpaper and flooring in that single room was glued in PROPERLY! Meant to stick forever! It took me long enough, but with a damp sponge, mini palette knife, sand paper and some elbow grease I managed to finally get rid of most of it. I now only have the room in the roof left to strip and then I can sand down the whole house! Can't wait to start painting! 

Let me show you the process up to where I am now:

This was the interior of the house the day I brought it home


 Inside the roof. 


 Vacumed and dusted, ready to start stripping down the wallpaper.


 Halfway there!


 Almost done!


 Just a tiny glimpse of some of the paper scraps.


 And the worse is done! Now the sanding begins....!

I'm really enjoying this renovation process. Getting excited about the end result now! 
Until next time, keep well!

~~~~~~~~~

Thank you for stopping by Little Canvas! If you are a first time visitor, welcome! I would be honoured if you would take a moment to leave a comment; subscribe to my blog or like my Facebook page, Little Canvas. Do keep in touch, I love to hear from new (and old) friends! Until next time, keep well!

It's a dollhouse obsession!

Now you know I've acquired the Mock Tudor dollhouse last year, and planned on renovating it this year. I have not started on it yet, as it is at a friend's house. He is kindly helping my with a few things I need tools for, which I don't have. Once it returns, I shall start work immediately!

However.... I now seem to attract houses to me like a moth to a flame! haha  I can't stop looking at dollhouses, watching auctions on eBay, etc. And so, during the month of February, I managed to acquire two more houses! One was a birthday gift from my other half, and the other house was given to me by two dear friends, in exchange for some of my paintings. How lucky am I??!! I'm extremely grateful and ecstatic I tell you!

Before I show you the pictures, all serious Miniaturists and Dollhouse collectors might want to look away now! These are not what you would call adult collectors' or period homes. But then, I'm not a collector in that sense of the word. I love dollhouses in ALL shapes, sizes and forms. I don't intend to stick to only period homes or collectors houses. I like variation and I believe everyone should do what makes them happy. For instance, my friend Tina loves period houses. Tudor, Georgian, Victorian. That's her passion and what an amazing collection of gorgeous houses she has. Maybe she will let me share a few pictures of them with you one day.

Me, I tend to like a lot of different styles and designs. Modern, period, retro, French shabby chic, etc.  I still have much to learn though when it comes to miniatures, dollhouses, and especially the renovation process. So I'll probably make lots of mistakes as I go along. But hey, practice makes progress; and by trial and error we learn! As long as we enjoy the process and have fun! I hope you will enjoy the journey with me!

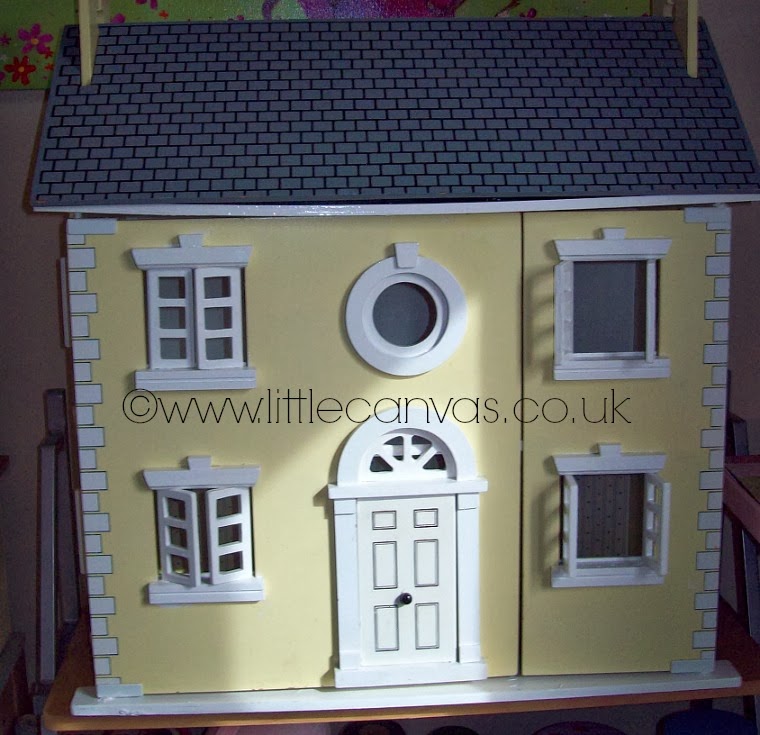
Here are my two new houses. They both need a little (ok, a LOT) of TLC! The first house came with a base which was initially intended for another house, but I plan on making it work with this house! The second one is painted in gloss enamel on the inside, so I guess I'm going to have lovely biceps when I'm finally done with it! There will be loads of sanding and painting before these will see a single piece of furniture. Next time I will show you the interior.


~~~~~~~~~~~~

Thank you for stopping by Little Canvas! If you are a first time visitor, welcome! I would be honoured if you would take a moment to leave a comment; subscribe to my blog or like my Facebook page, Little Canvas. Do keep in touch, I love to hear from new (and old) friends! Until next time, keep well!

The renovation ahead

I thought I'd share a bit more of my Mock Tudor with you today. Looking at these pictures, you will see I have quite the renovation job ahead of me. I doubt very much if I'll start on it before the new year though. You know how it is, once we reach the first of December it's all downhill to Christmas and New Year! For me, December is a time to focus on family and reflect on the past year (not too much though, better to look to the future, rather than the past!) and think about all your hopes, dreams and ambitions for the next year. It's about baking cookies, lighting candles, spending time with the kids and just taking it slow for a while..... wait.... I'm loosing track here! Back to the house!!

I've started working on furniture and accessories for the bedroom, will share that with you next time. I've also joined a miniature and dolls house club where I'm hoping to learn lots more on the topic, as I'm a bit of a novice as you might know!

So without further a-do, here are the photos:


The exterior will need a proper painting, and there are damage to the roof I will have to fix.

There's no front door, oh and no stairs inside. 
Also some water damage where the door should be.

The interior will be the most work. 
I plan on removing all the old wallpaper and flooring, 
and replace it with new wallpaper, paint and maybe carpets.
I'll see as I go along. 
Lots of water damage here too. 

I've removed all the curtains, will make new ones.
I need to figure out how to remove that mirror, as it seems
to be stuck with superglue!!
Oh, and I'm not fond of all the lamps and light fixings currently
in the house, just not sure how to get rid of them either!

Of course I had to see what my miniature paintings would look like in the house!
I quite like it. 
What do you think? 

~~~~~~~~~~~~~~

Thank you for stopping by Little Canvas! If you are a first time visitor, welcome! I would be honoured if you would take a moment to leave a comment; subscribe to my blog or like my Facebook page, Little Canvas. Do keep in touch, I love to hear from new (and old) friends! Until next time, keep well!

My first ever dolls house!

After months of searching, loosing auctions and lots of frustration, I finally won the auction on a dolls house this weekend!!! Just when I decided I will have to build one myself! haha And at a ridiculous price! Vintage, will need lots of renovation and TLC, but I don't mind!! I was soooo excited, I could barely breathe!! And here she is (not the best picture, was taken immediately as I walked in the door with her, more pictures to follow soon!):


I've already cleaned her out, removed all the carpets (not glued thankfully!) and curtains. Some water damage, no stairs or front door, and a LOT of research for me to do!! So far all info I could gather indicates it's a mock Tudor from the 1940's. I will be keeping the exterior as is, just give it a new coat of paint and restore whatever's needed. The inside will not be decorated in a Tudor style however - I hear some of you gasping at this, let me explain!

One of the main reasons I was looking for a dolls house, was to use it as a prop/background to take pictures of my miniature paintings for Little Canvas. I will need to decorate in neutral colours, and different styles, so as to show of my paintings best. I've already started looking at wallpaper, carpet and fabric samples for the curtains. 

I will keep you updated on my progress as I go along. On a very tight budget, I will have to figure out a way to create most things myself, even some furniture! If you have any ideas, suggestions or advice, feel free to share in the comments below, as it will be most welcome!

---------------------
Thank you for stopping by Little Canvas! If you are a first time visitor, welcome! I would be honoured if you would take a moment to leave a comment; subscribe to my blog or like my Facebook page, Little Canvas. Do keep in touch, I love to hear from new (and old) friends! Until next time, keep well!